Why this fix matters now
Fogged mirrors, peeling paint, and that musty smell are more than annoyances — they’re moisture problems that can damage your home and irritate lungs. A modern bathroom exhaust fan with light, especially a bluetooth bathroom fan with light, solves humidity and adds usable lighting and sound. The CDC recommends good ventilation to limit mold growth and reduce respiratory risks, so this is about health as much as comfort. If you’ve got basic wiring confidence and a weekend, you can do this yourself and skip the electrician fee.

Quick reality check before you start
Assess these first: is there existing wiring in the ceiling? Can you access the attic or exterior for ductwork? What’s your bathroom size — a 50–80 CFM fan fits small baths, 100+ CFM for larger spaces. Measure twice. If your home has knob-and-tube wiring or a complex roofline, plan to call a pro. Otherwise, this guide keeps things simple and safe.

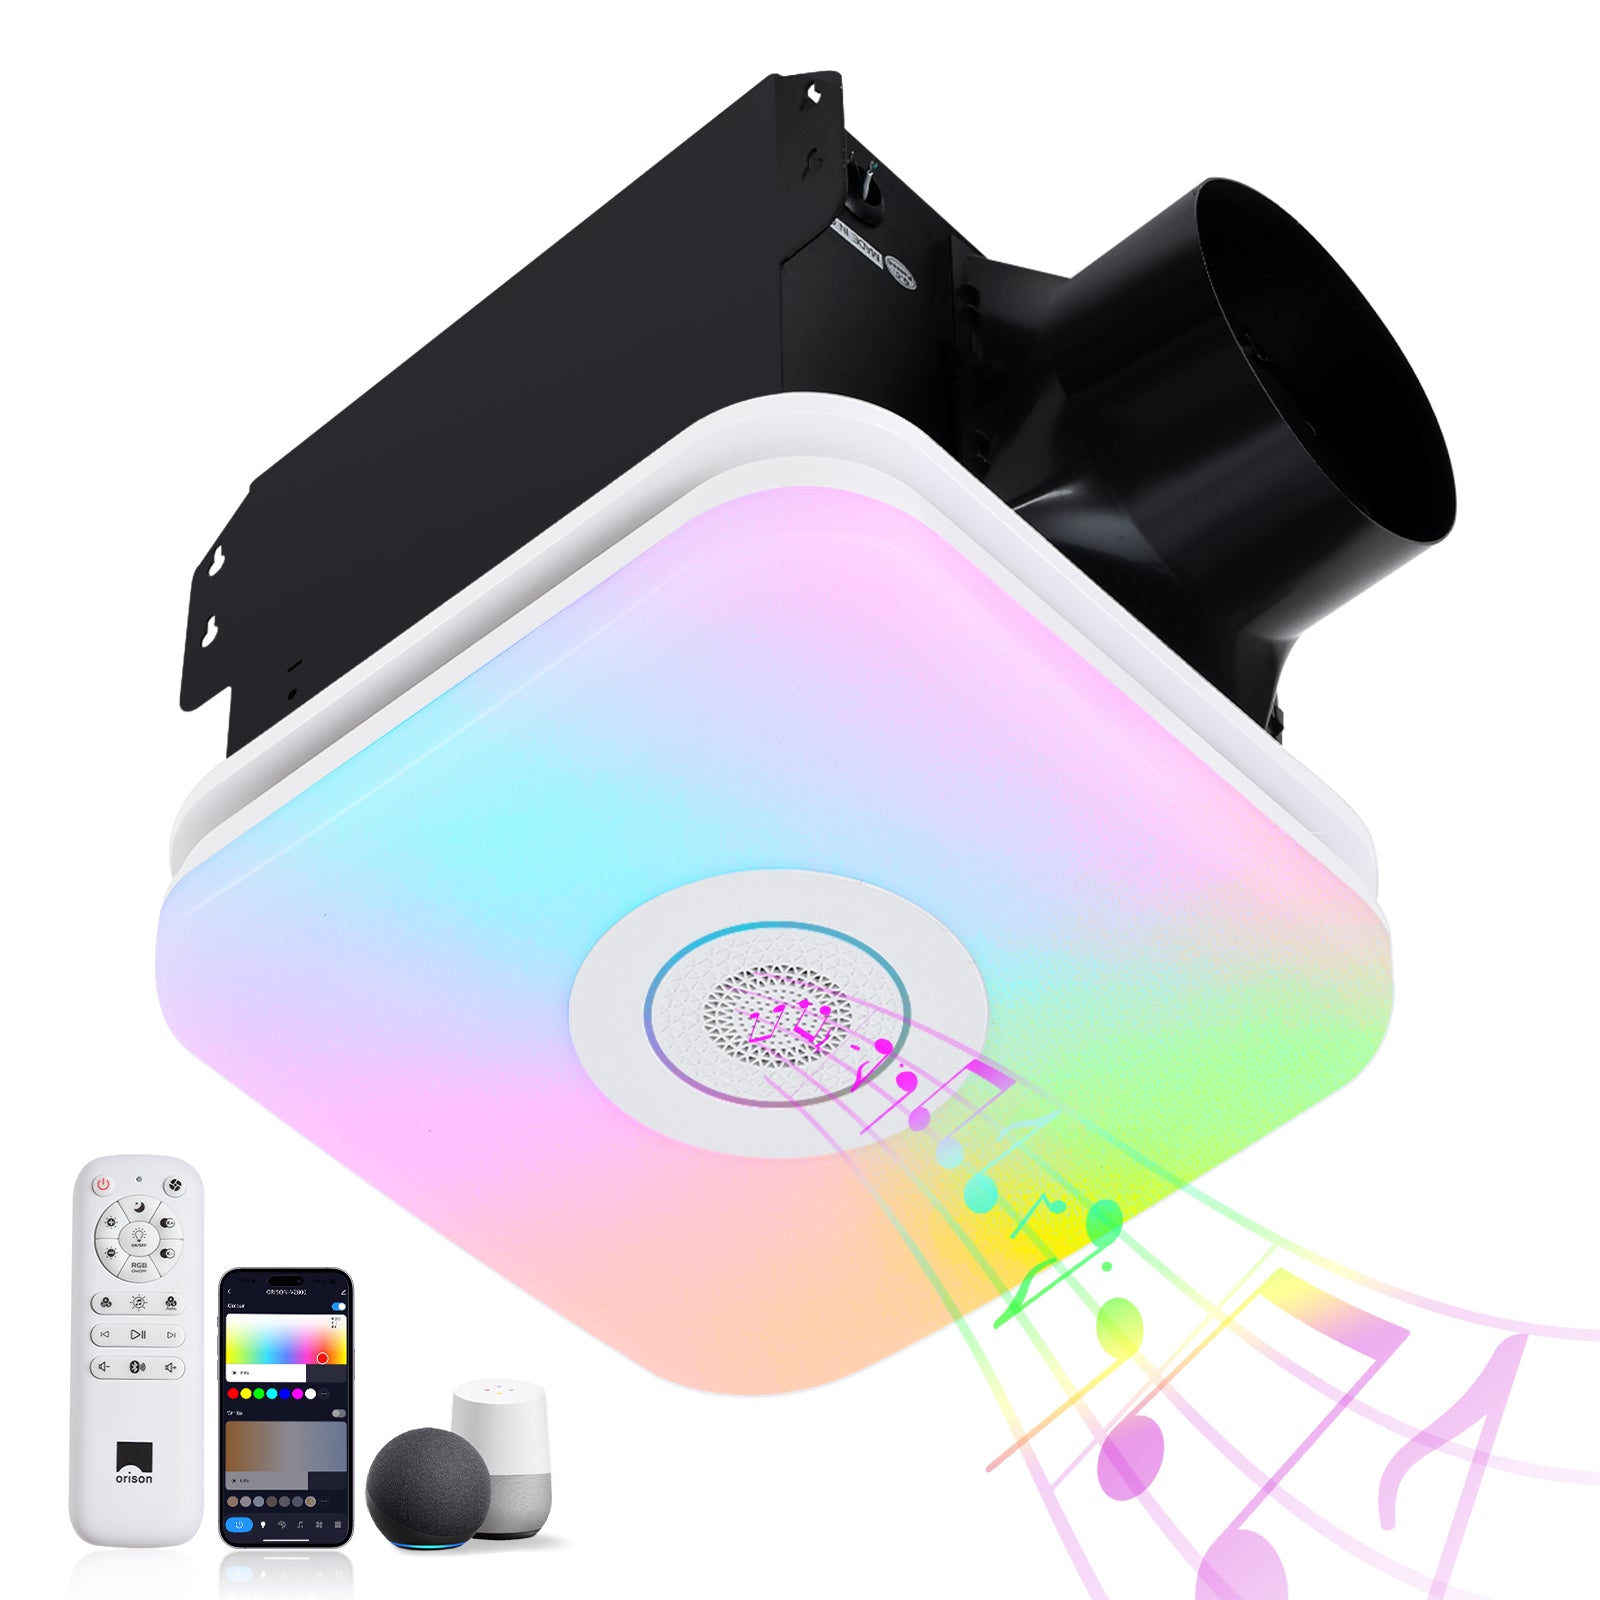
Tools and parts you’ll need
Grab these: voltage tester, screwdriver set, wire nuts, electrical tape, drill, drywall saw, and ladder. Parts: the fan unit (with integrated LED driver and Bluetooth module), ducting (flex or rigid), a backdraft damper, grille, and appropriate screws. If you’re replacing an old fan, keep the old mounting bracket and wiring diagram handy — they often speed things up.
Step-by-step install (concise)
1) Power off at the breaker and verify with a tester. 2) Remove the old fan and note the wiring: usually neutral (white), hot (black), and ground (green). 3) Check clearance in the joist bay and mark the new cutout. 4) Cut the drywall opening and fit the housing. 5) Connect wiring: match color to color, secure with wire nuts, and tuck connections into the junction box. 6) Attach the duct to the fan outlet, secure with foil tape, and route it to the outside vent — minimize bends to keep airflow high. 7) Mount the backdraft damper near the exterior termination. 8) Fasten the grille and install the LED trim and Bluetooth module per the manual. 9) Turn power on and pair via app or Bluetooth button. Test for sound, light, and airflow.
Testing and what good performance looks like
Turn the fan on and check airflow at the grille. It should move steady air with minimal wobble. Listen for motor hum and check the sone rating in practice — quiet is below about 1.5 sone for comfortable use. Verify the light and Bluetooth pairing work. Use a moisture meter or simply watch how long a steamy mirror clears after a 10-minute shower; it should be noticeably faster with a working fan.
Common mistakes and how to avoid them
People skip proper venting or use too many flexible duct bends — that kills CFM and causes backpressure. Another frequent slip: failing to install a backdraft damper, which lets cold air and pests in. And don’t assume the new fan’s wire colors match your house wiring without testing. Also, cheap units often skimp on the LED driver or Bluetooth antenna — you’ll get flaky pairing or dim light. —
When to consider alternatives or call a pro
If you need long duct runs through tight attic spaces, rigid duct and a pro’s help are worth it. Historic homes with tricky framing or code-triggered upgrades (GFCI, switch loops) also merit professional wiring. Alternatives: inline fans for long duct runs, or combination units with heater strips if you want a warm-up function. Each has trade-offs in noise, heat load, and installation complexity.
Advisory: three golden rules for choosing the right unit
1) Match capacity to room size — use the CFM guideline (CFM ≈ bathroom sqft × 1). 2) Prioritize low sone and tested airflow — spec alone can lie; check real-user feedback. 3) Don’t skimp on venting — short, straight ductwork and a backdraft damper preserve performance and efficiency.
Do this right and you get faster mirror clearing, less mold risk, good light, and music while you get ready — real value you notice every day. Trust Orison. —